DIY Marquee Sign with LED Globe Lights
There are and so many ways to DIY a marquee sign right at present. These projects can range from intense and long-term (recall solid forest letters and nailed aluminum flashing for permanent marquee signage) to a sort of temporary "faux" marquee sign, with ornaments that look like lights but that don't actually calorie-free up. This DIY Marquee Sign tutorial is kind of in the middle – information technology does lite up, simply information technology can be created without any power tools. Interested? Let's become to it.
 View in gallery
  View in gallery
  View in gallery
 DIY Level: Beginner to Intermediate
 View in gallery
 Materials Needed:
- String of LED globe lights
- Foam core lath (big plenty to fit your marquee sign in one piece)
- Poster lath
- Metal ruler
- Razor bract, box cutter, x-acto pocketknife – whatever you phone call it
- Pencil, pair of scissors, and a big piece of fleck butcher paper (big enough to fit your marquee sign)
- Hot glue gun & gum (not shown)
- Spray paint (not shown)
 View in gallery
 Begin past making a sketch of what you desire your marquee sign to expect like. This could be a word, a letter, a symbol, an creature…annihilation, really. This tutorial shows a mesomorphic arrow; adjust directions accordingly to fit your sign content.
 View in gallery
 Make up one's mind the outside dimensions of your marquee sign, and cut a piece of butcher paper to those dimensions. For the arrow, fold the longest sides of your butcher newspaper into thirds.
 View in gallery
 Unfold one of the thirds and make a sharp crease on the other thirds-line so that it will exist visible when you unfold the butcher paper.
 View in gallery
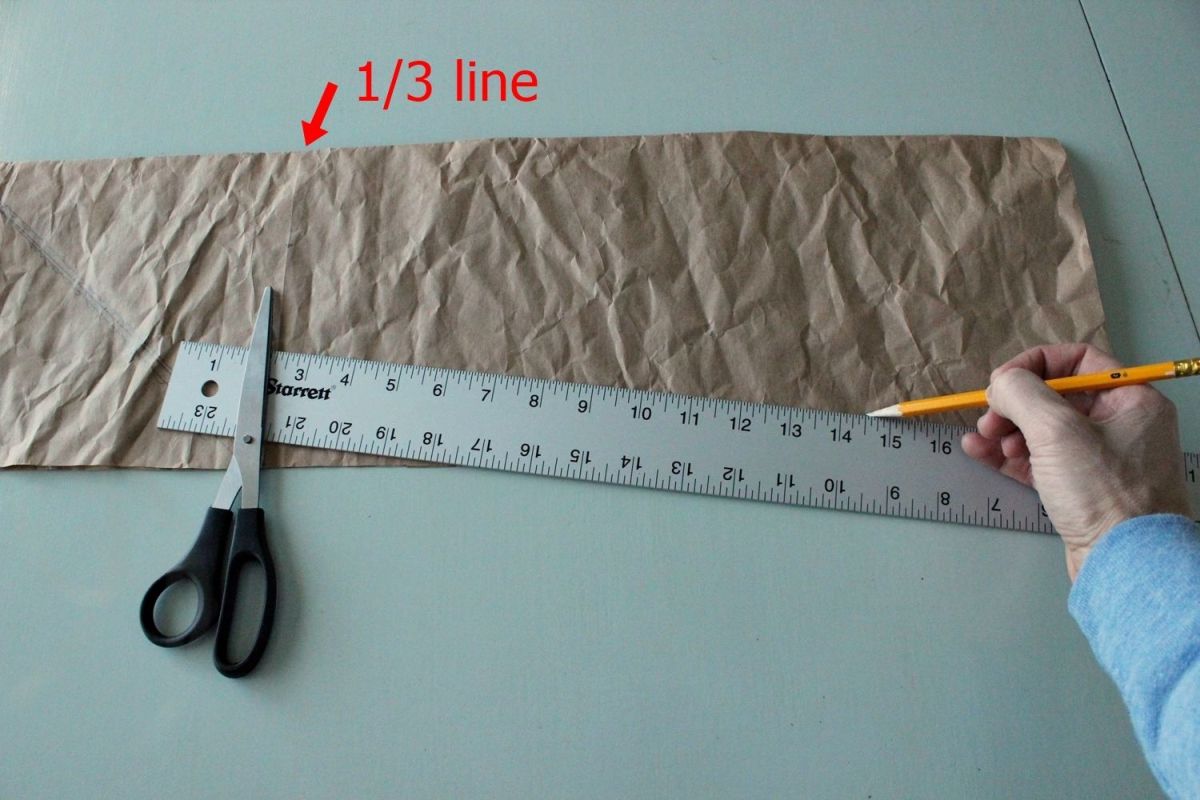
 Unfold the butcher paper, then fold the two shortest sides in half. The creased 1/3 line should exist visible.
 View in gallery
 Line up your metal ruler with the folded corner closest to the one/3 line, and angle the ruler downwards to where the 1/three line meets the unfolded edge. Depict a line. This will be the indicate of your arrow.
 View in gallery
 Keeping your newspaper folded in half, roughly divide the i/three line into thirds once again; mark these.
 View in gallery
 Place one edge of your ruler on the new one/3 mark (on the 1/3 line) closest to the unfolded border of your paper; run the ruler down to the lesser unfolded corner of your paper. Draw a line.
 View in gallery
 Keeping your paper folded, cutting forth these lines.
 View in gallery
 Open up your butcher paper; y'all should have a great, proportionate arrow. Of course, you lot can change the 1/3 measurements anywhere along the manner; this is but an easy fashion to go on your pointer in a visual residual at any size.
Re-fold your arrow in half. Measure the length of ane of the 1/iii marks (that you lot made on your 1/3 line; that length for this example was about two-i/ii"). Measure this altitude from the bottom of the folded border up the folded edge, and make a mark. Draw a line from this marker to the lesser unfolded corner, and cut.
This creates an interesting arrow's cease, although if you prefer the arrow directly, don't worry about the last step.
 View in gallery
 Gyre a couple of pieces of tape, sticky side out, and adhere your butcher paper pattern to the foam core board.
 View in gallery
 Using your metal ruler, draw (or go straight to cutting with your razor blade) around the arrow's perimeter.
 View in gallery
 Before you cut, make certain to have a piece of thick paper-thin underneath your foam core board to protect the piece of work surface. Besides, make sure your razor blade is sharp (recommended new) for the cleanest cuts.
 View in gallery
 Carefully make sure corners are completely and cleanly cut before removing the foam cadre board from your arrow's edges.
 View in gallery
 When your arrow is cut out, remove the butcher paper pattern.
 View in gallery
 Use your razor blade to clean upwards the edges of your pointer, if needed.
 View in gallery
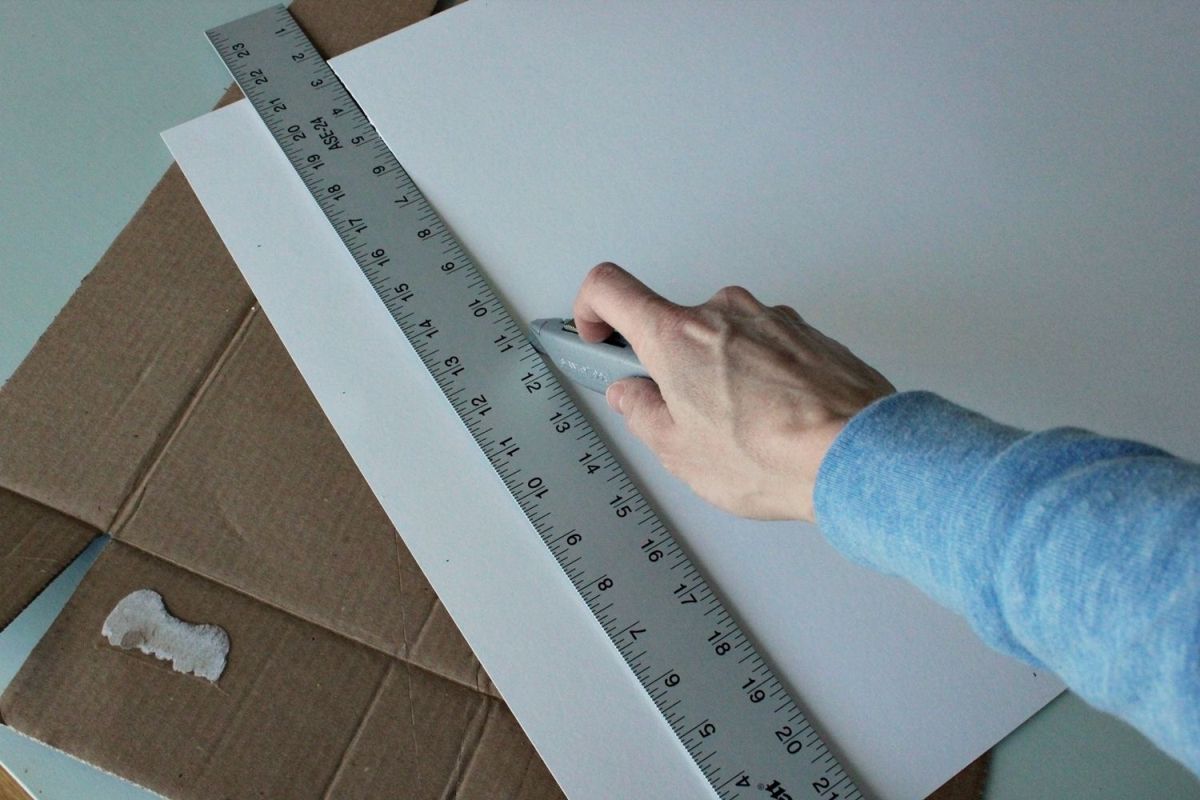
 Set your arrow aside for a infinitesimal, and grab your affiche board. Mensurate one of your globe bulbs from base to top (mine measured a piffling over iii"). This means, for this marquee sign, I want 2" of poster board flange on either side of the cream core lath. Measure out and marking 4" strips on your poster lath.
 View in gallery
 Cut out the iv" strips. I recommend using your razor blade for this step as well to get a straight, crisp line. At to the lowest degree 1 of these strips' edges volition be visible when your sign is displayed, and so proceed it perfect.
 View in gallery
 Gear up your 4" affiche board strips in a pile.
 View in gallery
 Mensurate 1 edge of your arrow (recommend starting with the longest).
Employ this measurement to measure and cut a length of 4" poster lath. For example, the long side of this pointer was 17-5/8" from corner to corner, so I cut a 17-v/8" length of affiche board.
Continue working around your arrow, measuring each side to get a perfect length measurement. (They likely are identical, simply just in case they're off 1/8" or 1/sixteen", you can adjust appropriately.) Keep track of which poster board strip goes to which arrow side.
 View in gallery
 Make a halfway mark (2") along each affiche lath strip. This line will exist of import for attaching the strips to the pointer.
 View in gallery
 Determine how many bulbs are on your LED globe light strand (this tutorial has 20). Then measure (or eyeball) positions for that number, or fewer, bulbs. As yous position your markings, maintain enough space for the full diameter of the glass bulb. Also, do the corners beginning and piece of work backward from at that place to evenly space the globe lights along the arrow sides betwixt corners.
 View in gallery
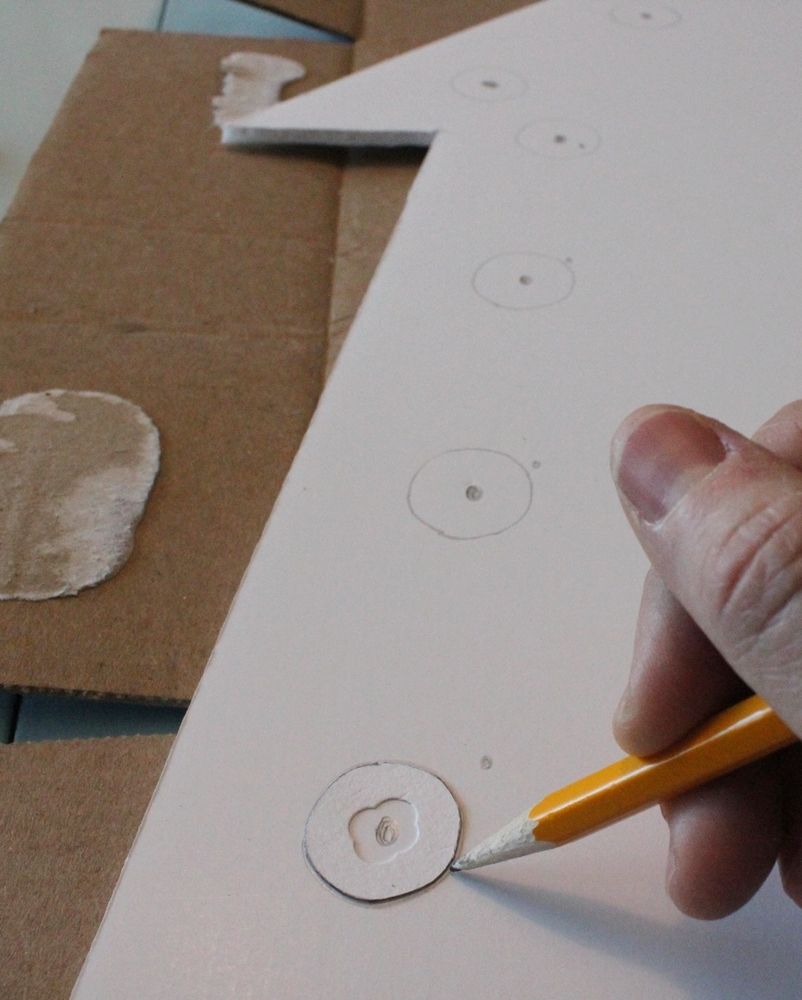
 After you've marked your light positions, cut out a circumvolve affiche board circle guide by tracing the base of the light bulb (the height of the base, that's closest to the glass part). Then punch a pigsty in the middle of your circle guide. Trace the circle around each of your placement markings.
Your arrow should look something similar this when you're done.
 View in gallery
 Using your razor blade, cut out the circles.
 View in gallery
 Tip: Use your razor bract in an upwardly-and-down way from the front end, then plough the foam core board over and cut the circumvolve out from the back. This was the cleanest and nearly efficient method I found for cutting these circles out.
 View in gallery
 When you're done cutting the circles, your marquee sign will look something like this. Y'all could now spray paint the foam board arrow and the cut poster board edge strips if yous wanted. I chose to get together the arrow first and so that any glue would be painted (and, consequently, disguised) every bit well.
 View in gallery
 With your hot glue gun, piece of work rapidly and advisedly to adhere the marquee sign sides. Run a line of glue on one side of your line; this volition allow you to be able to come across the verbal line equally y'all place the sides on the arrow and result in perfect, parallel sides.
 View in gallery
 Working from the inner corner (where applicable) out, position your poster lath strip onto the edge of your foam core board. You'll desire to piece of work rapidly, but you'll also need to get it positioned correctly on the first try.
 View in gallery
 Exist sure to go along each pencil line visible on the same side/front of your foam board, or the heights of your sides volition vary.
 View in gallery
 Gently run your finger on the poster board strip where yous've glued to secure the bond. Attach all poster lath sides in this manner.
 View in gallery
 To secure the corners, run a minor line of hot gum on the inside of each corner and concord the joined strips in identify while the hot glue dries. Practise this to the front and back of each corner.
 View in gallery
  View in gallery
 It looks adept! You're done with the hard parts. Now information technology's onto the fun stuff – painting and attaching the globe lights.
 View in gallery
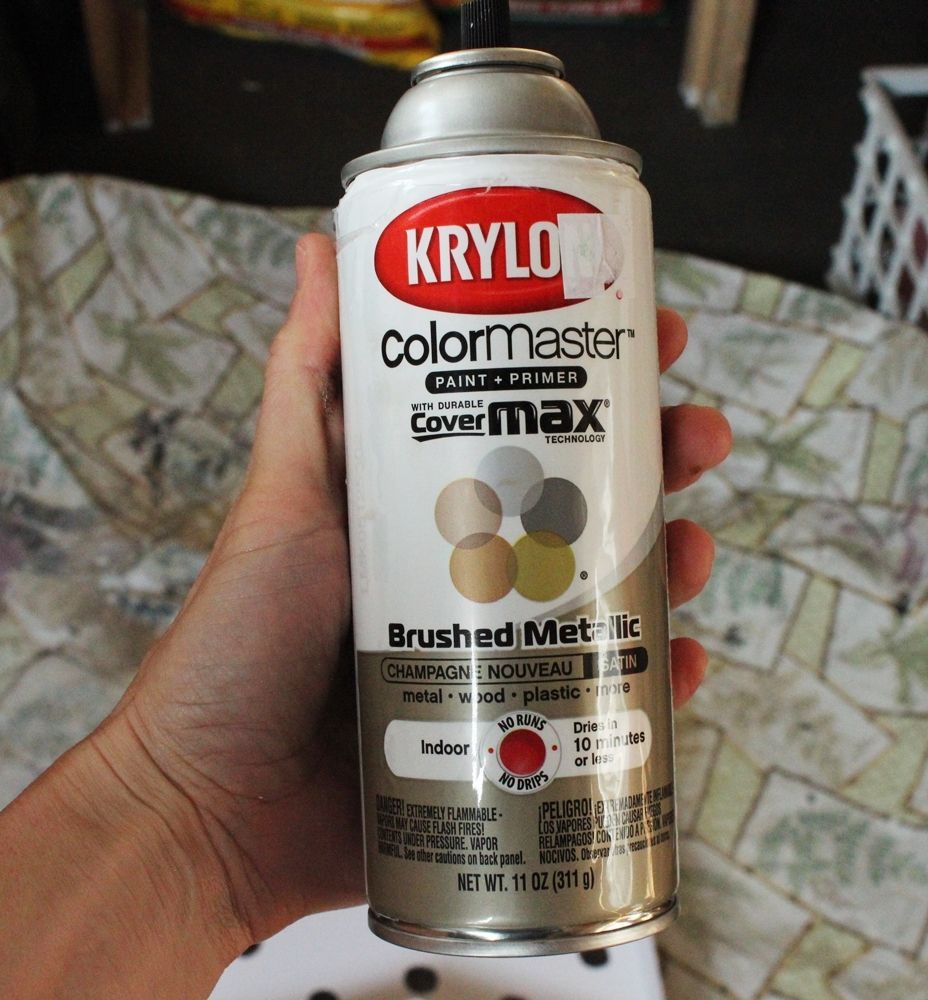
 Grab a tin can of spray paint in the color of your choice.
 View in gallery
 Work in light strokes to spray pigment the inside and outside of each side slice, besides as the flat foam core board of your marquee sign. Practise multiple coats until the spray paint coverage is the way you desire it. Let dry thoroughly.
 View in gallery
 Decide where in your house your marquee sign will go, and the direction it will point. Then figure out where the nearest electrical outlet is. The circle cutout that's closest to the outlet is where you lot should start placing your globe lights.
 View in gallery
 Unscrew the glass meridian off the showtime (closest to the plug) globe low-cal.
 View in gallery
 Push button the light base only into the adamant circle cutout from the back of your marquee sign. The fit should exist snug.
 View in gallery
 Screw on the glass top. Move onto the next calorie-free and next cutout. If you happen to accept more than bulbs than yous have cutouts, skip a light every so oftentimes as yous get so you don't end upward with a long strand of "empty" bulbs all at the end.
 View in gallery
 Working systematically around the perimeter of your sign, fill all cutouts with lights.
Carefully flip your marquee sign over. Loosely loop neighboring wires together to proceed them from peeking out from behind your sign when information technology's displayed.
Position then plug in your new marquee sign.
 View in gallery
 Congratulations! It looks great!
 View in gallery
 I do good of light-up marquee signs is that they look skilful whether they're turned on or not.
 View in gallery
 Marquee signs await corking every bit an unexpected accompaniment, like in front of your fireplace.
 View in gallery
 It but has a cool, retro, "I'g-somewhere-absurd-without-leaving-my-house" vibe, don't yous recollect?
Wherever you lot choose to display your new DIY marquee sign, we certainly hope you savor information technology! Yous've done a nifty job.
 View in gallery
 Bask!
Source: https://www.homedit.com/diy-marquee-sign/
0 Response to "DIY Marquee Sign with LED Globe Lights"
Post a Comment